My Halloween heart just loves a good mask! And, until now, masks were reserved only for creeping around the neighborhood on All Hallow’s Eve. But, I’ve got a sew-at-home mask tutorial with a few tricks that make these masks a real treat!

By now, there are tons of mask tutorials out there. And I even tried to make a few of them– and failed miserably. See, I’m what you’d call a “Halloween Screamstress”, who only drags out the old machine once a year to piece together a couple of macabre monstrosities, where crooked hems and stray threads add to the appalling appeal. And, as “easy” as the tutorials claimed to be, the resulting bulky eyesore ended up being nothing more than a dreadful face diaper. Plus, what fit my scant silhouette never quite fit the hub’s angular appearance. The one-size/one-style-fits-all design was not something I’d be caught dead in– because those bunchy, lumpy, mug muffs would have truly put the “mourning” in my early morning grocery run, and clash with my bewitching DIY Purifying Potion & Wearable Atomizer.
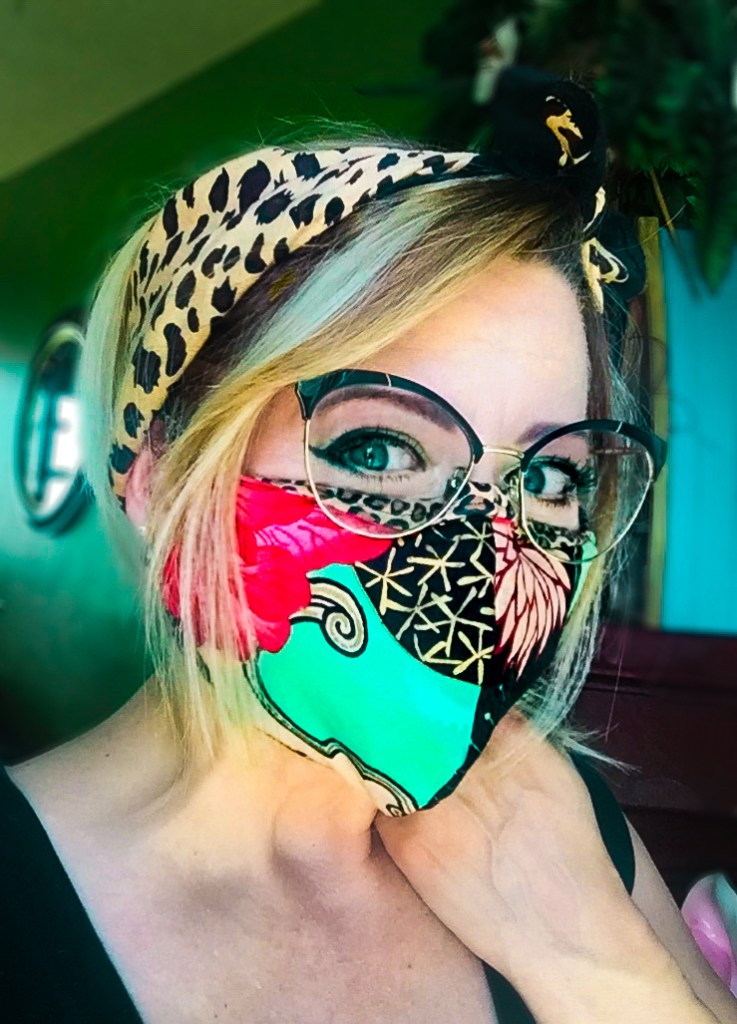
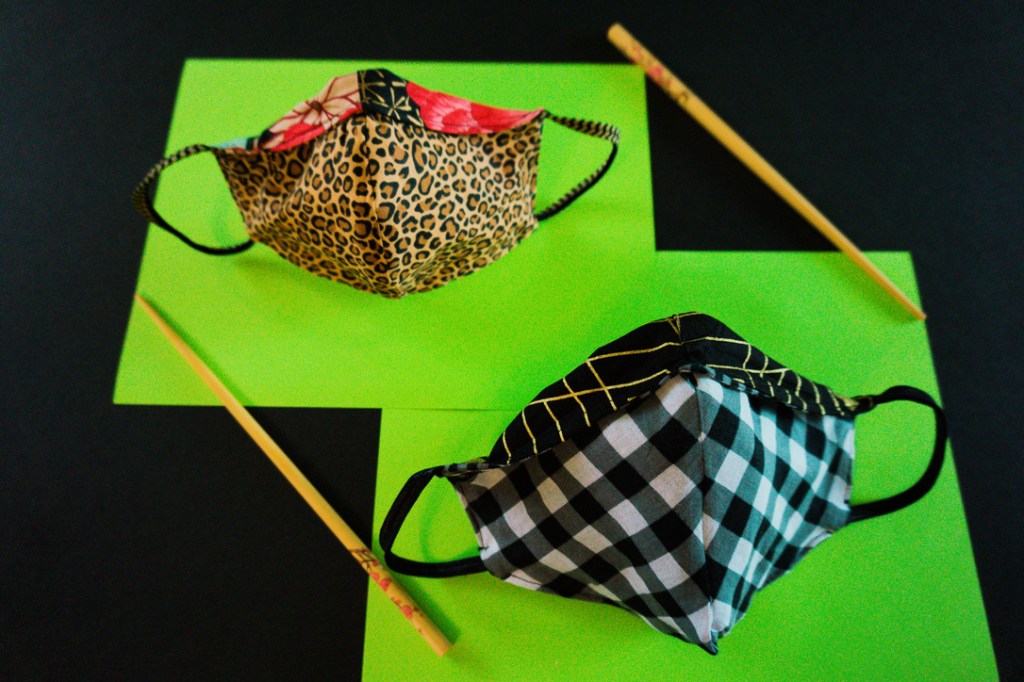
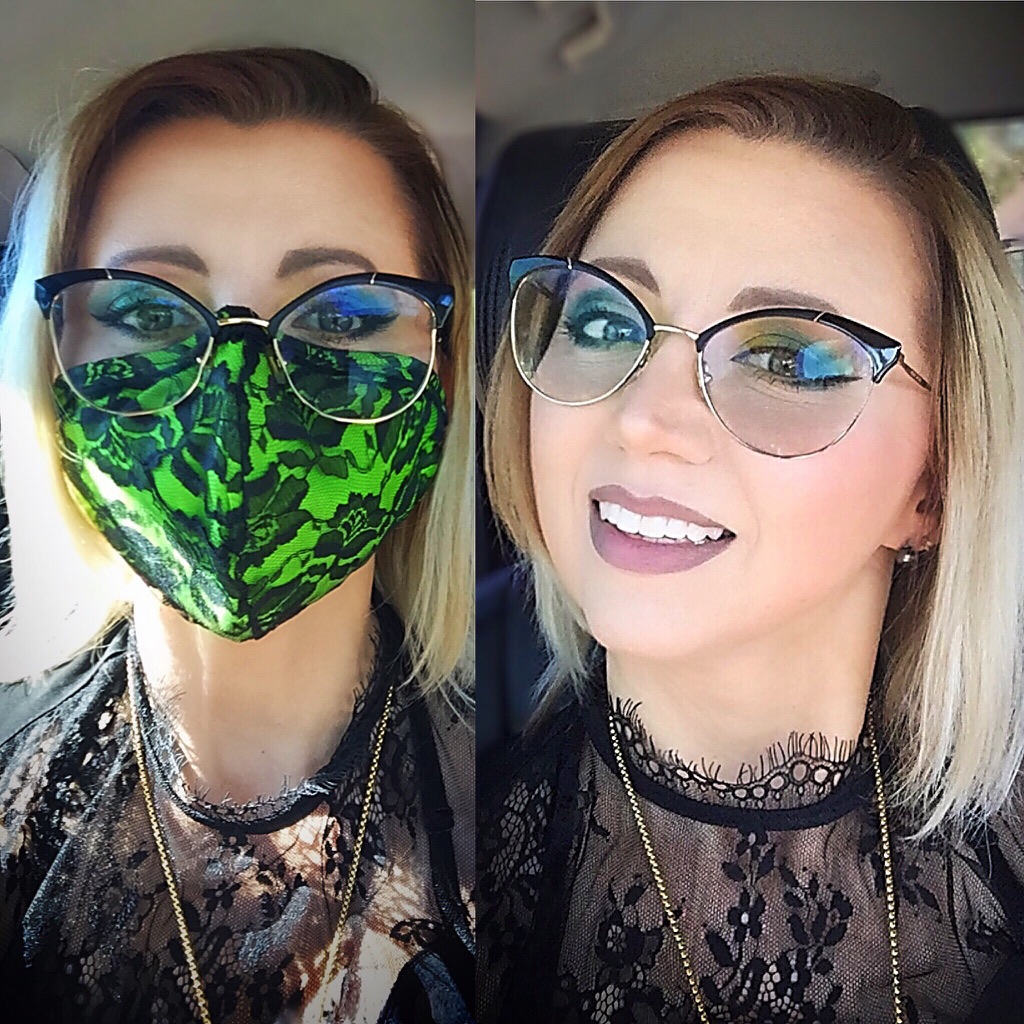
Therefore, my mad scientist alter ego got to work experimenting with three smoother, sleeker, washable and reversible designs, which all have adjustable, comfortable ear elastics, and virus-blocking, custom-fit filters for enhanced safety. Plus, all three Pretty Spooky designs keep your glasses from fogging up like an autumn cemetery at daybreak.

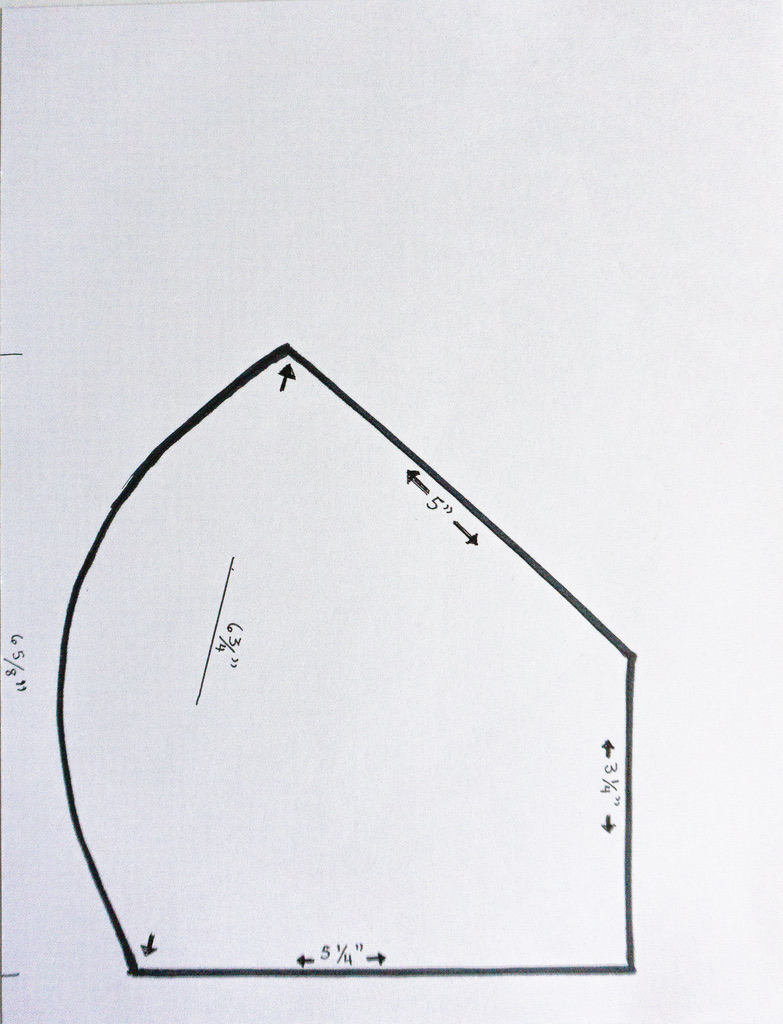
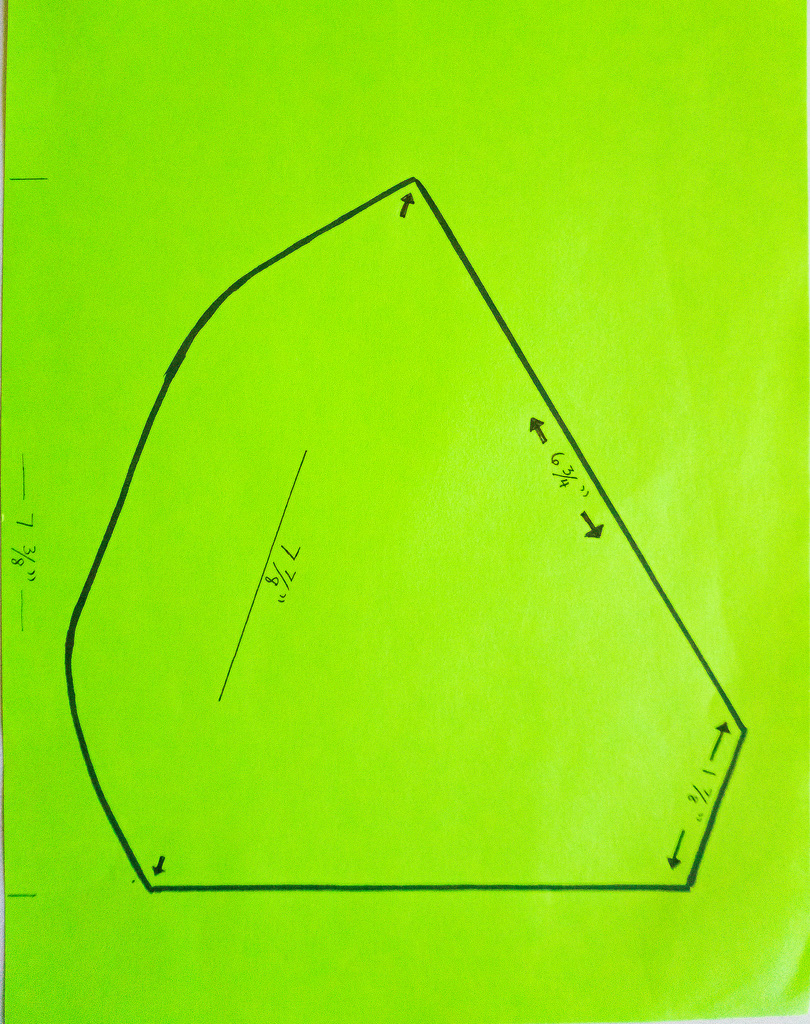
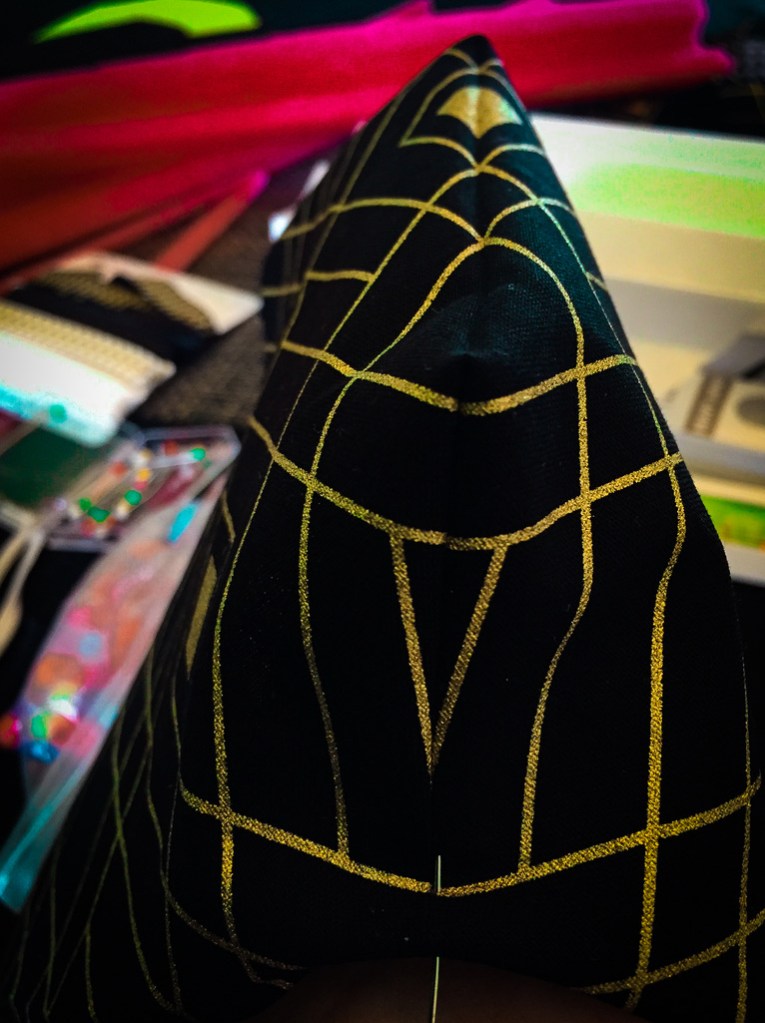
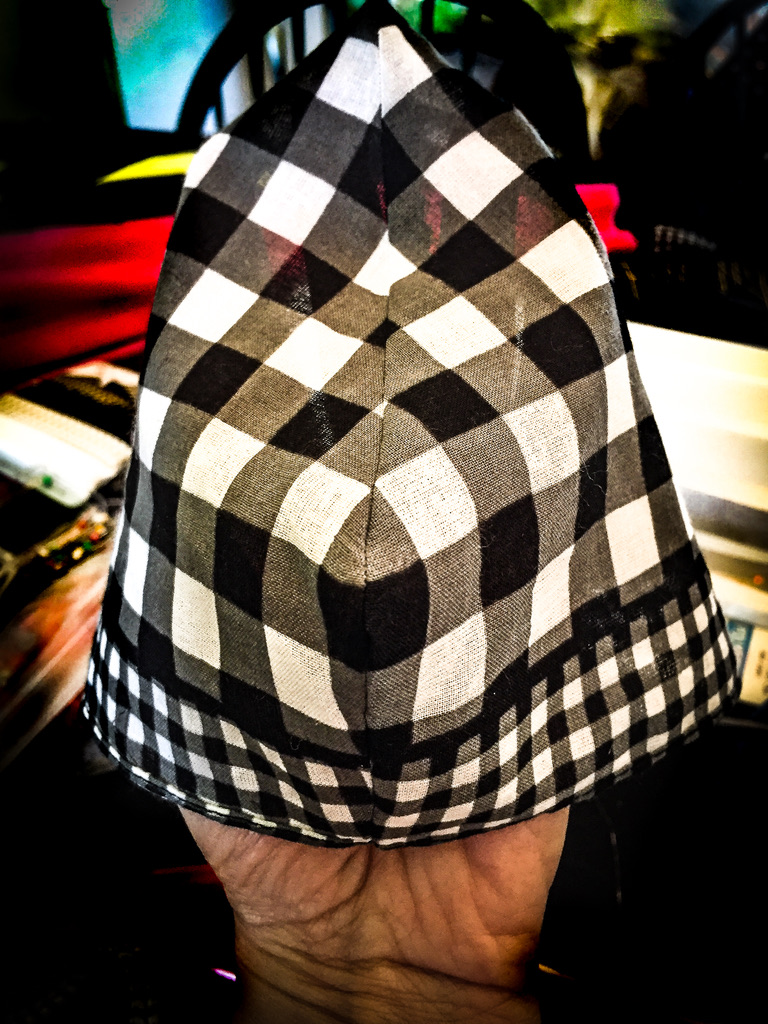
For the scant, the slant, and the more common contours in between, I created three different designs. My first design was curved to fit my skimpy side view. Then, I created a very angular design for more pronounced profiles. Finally, I created a combo, for those with less extreme features.

For this mere “Halloween Screamstress” and her fussy old machine, working with breathable cotton fabrics of the same weight and weave was easier and led to less puckering and smoother seams. Keep in mind that the fabric will be doubled, since it is reversible, and there will be a filter inside. So, the fabric should not be heavy or thick.
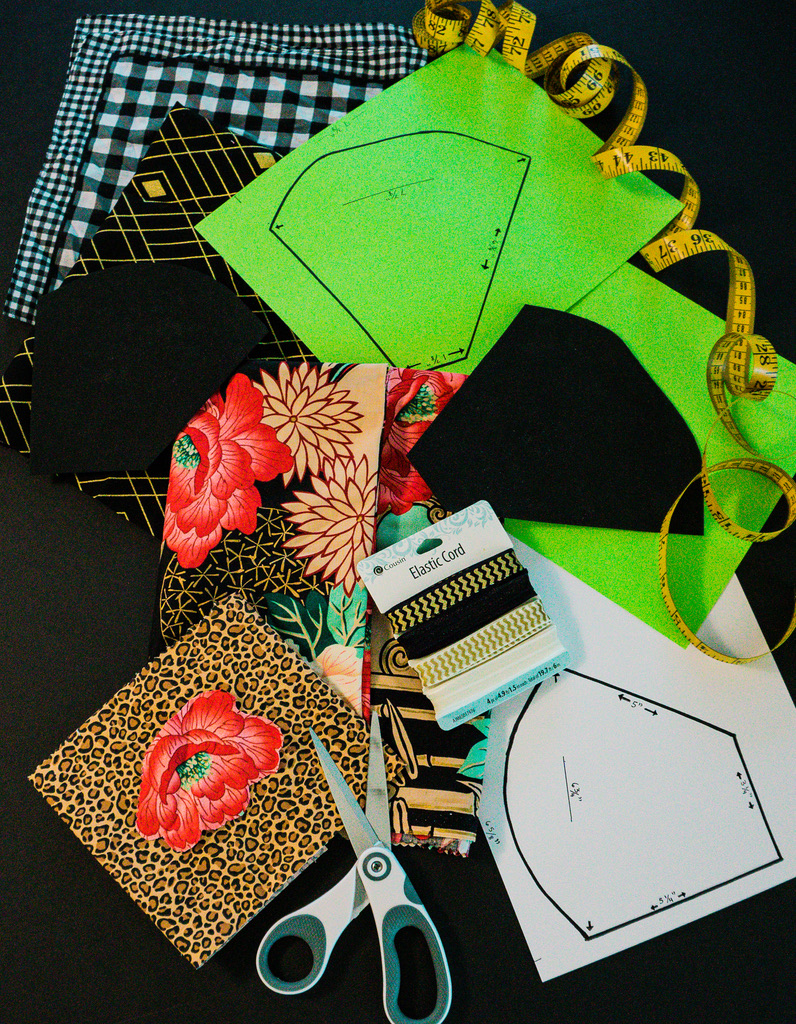
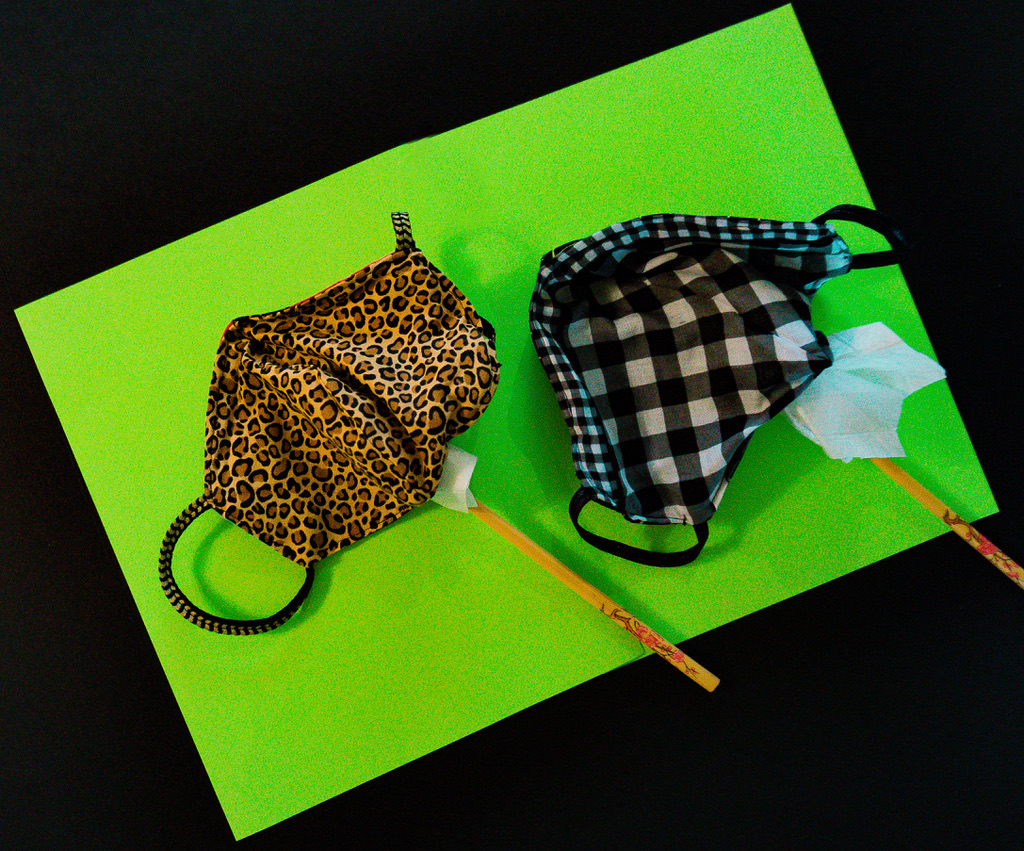
Also, coordinating colors and patterns are advised due to the optional fold-over, anti-fog glasses flap, which moves the nose wire lower on the bridge of the nose, permitting glasses to comfortably sit atop the mask, therefore letting out less warm air. The fold-over flap also allows for more adjustment in the size of the mask, since a larger fold will shorten the length of the mask, and unfolding it will increase the length. Take note: a closer fit equals a sleeker appearance, and avoids the sloppy style of the not-so-swanky snout sling. Therefore, matching fabrics look nicer when folded at the bridge of the nose. I chose sexy, black geometrics for my Pretty Spooky Man, and a leopard-floral combo to create a retro, pinup, tiki vibe for myself. (Speaking of tiki, it’s about time for an ‘O Ka Make on Vaycay tiki cocktail!)
Luckily, I had some craft foam left over from my Easy n’ Eerie Lamp Shade DIY to make durable, more rigid patterns, enabling more precise cuts. Masks are small, so accuracy matters. A warped and wrinkled paper pattern could make the whole project as off-kilter as a one-winged bat.
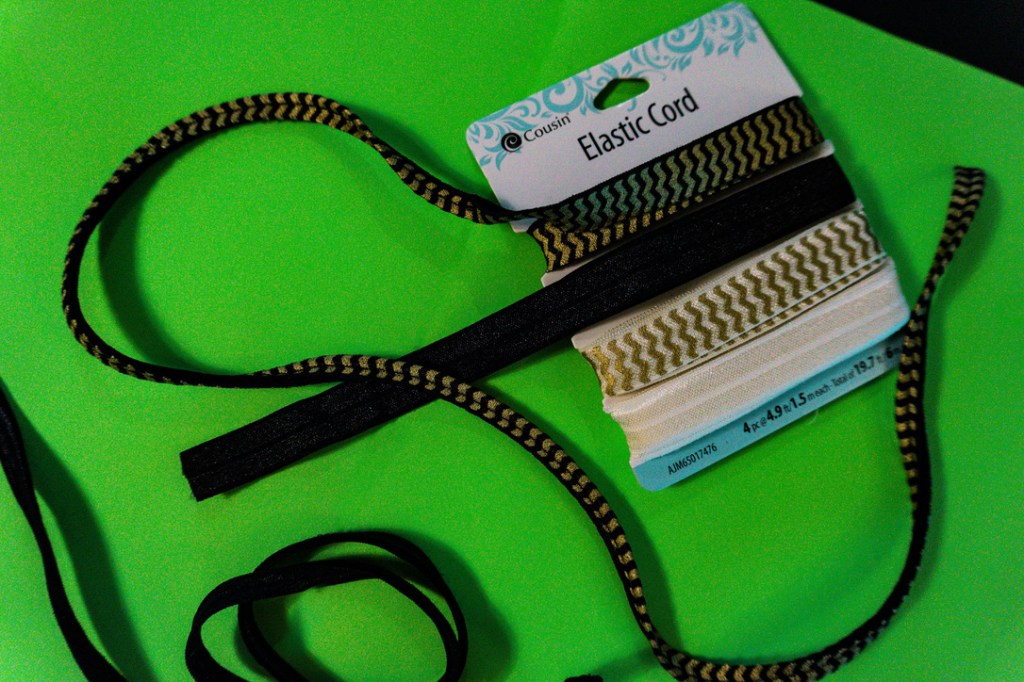
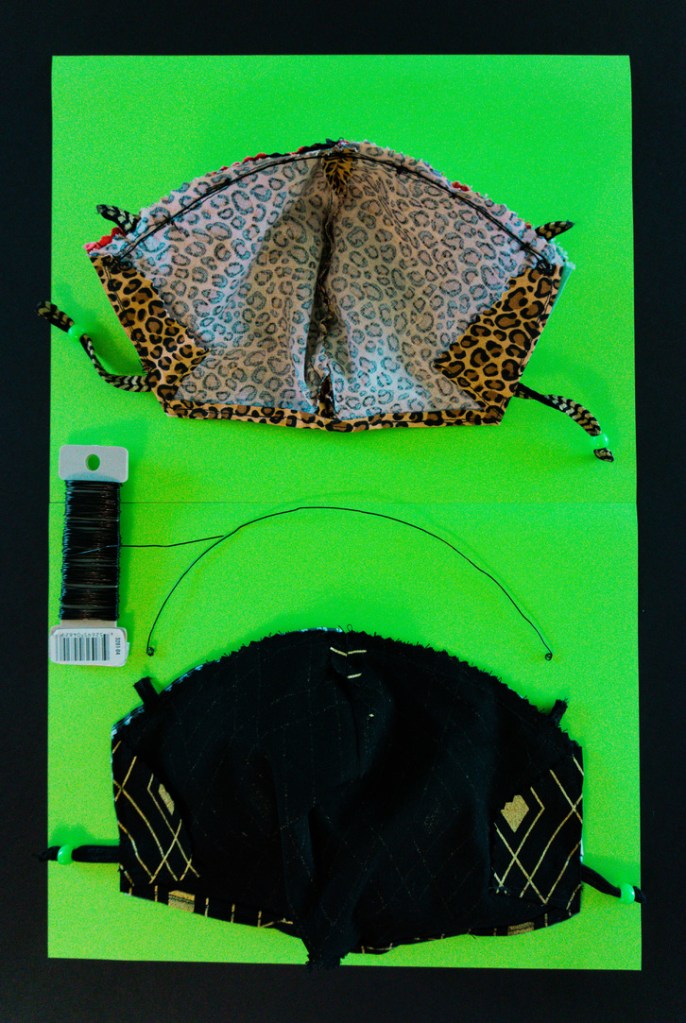
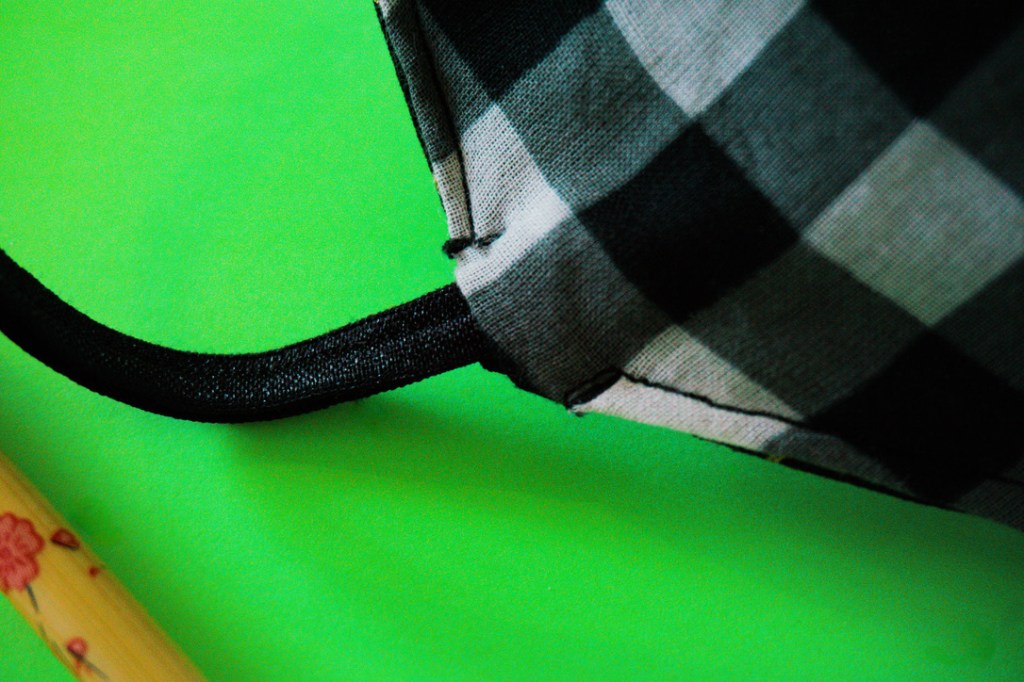
Because no one likes the horrible hair crease that an elastic band leaves, ear elastics are the only fashionable option. While earning style points, ear elastics can be lacking in the comfort department. However, I found an elastic, printed ribbon in the craft section of the big box store, which is softer and more comfortable, even when the elastic is sewn double to make it thinner to fit over the ear.
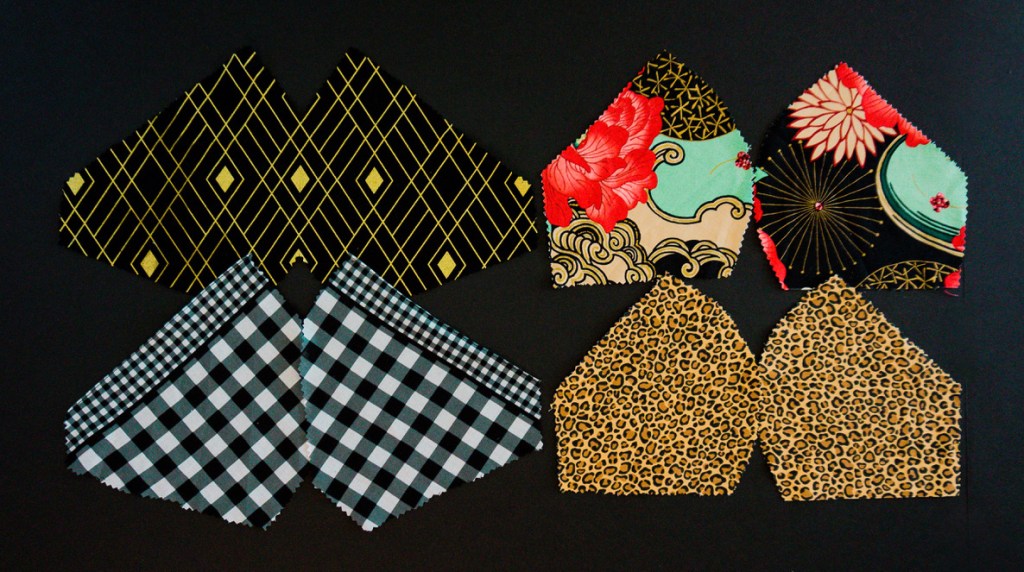
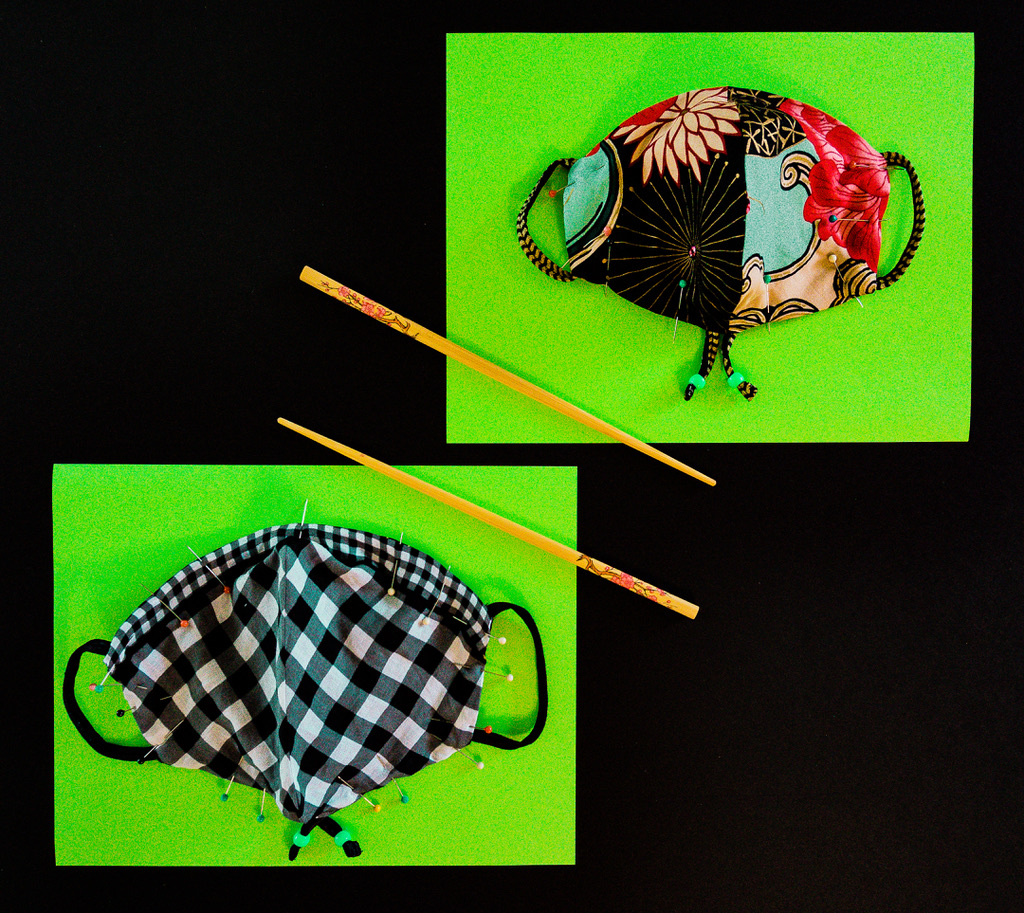
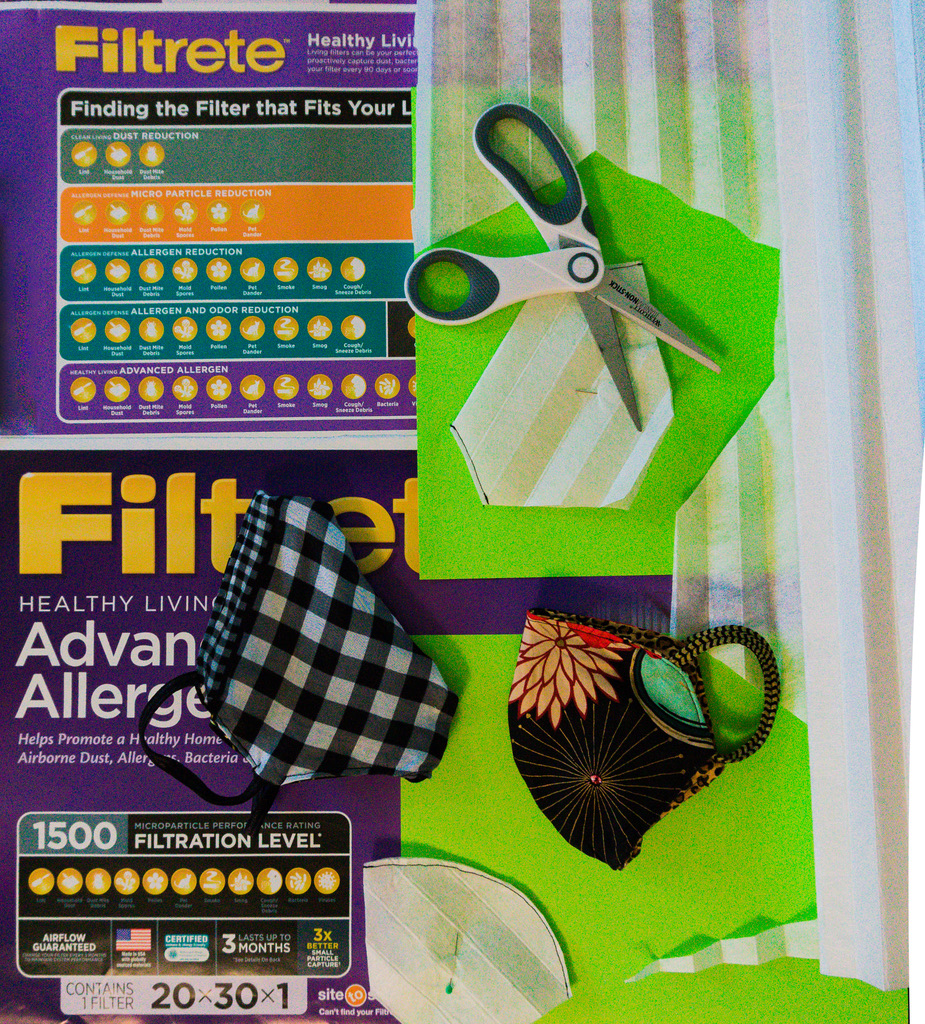
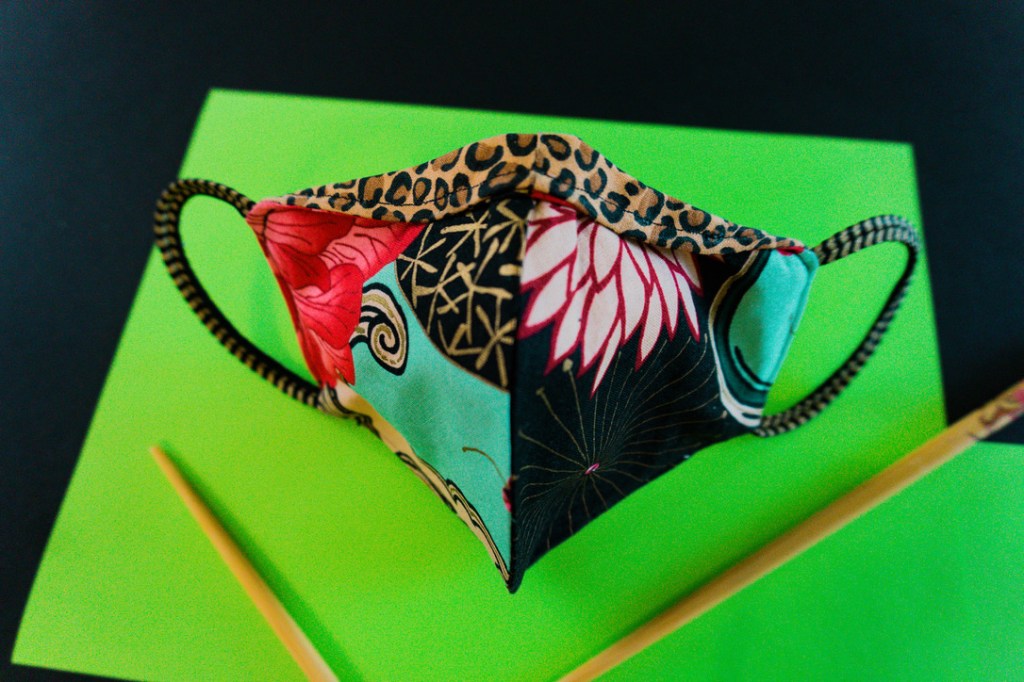
Depending on the symmetry or simplicity of your print, the angular mask can be folded and cut as a single piece, like the gold and black fabric on the top, left. But, in order to retain the mini-checked boarder, while realigning the larger checks, it was necessary to cut two, separate pieces on the bottom, left. And, for the curved design, it’s important to take the print into consideration, especially since it is four, separate pieces. It took a couple tries to incorporate the correct balance of color and graphics with such a large, busy motif on the top, right. And, if you want something as easy as being a ghost in a sheet shop, go for tiny, randomly repeating prints, like leopard.
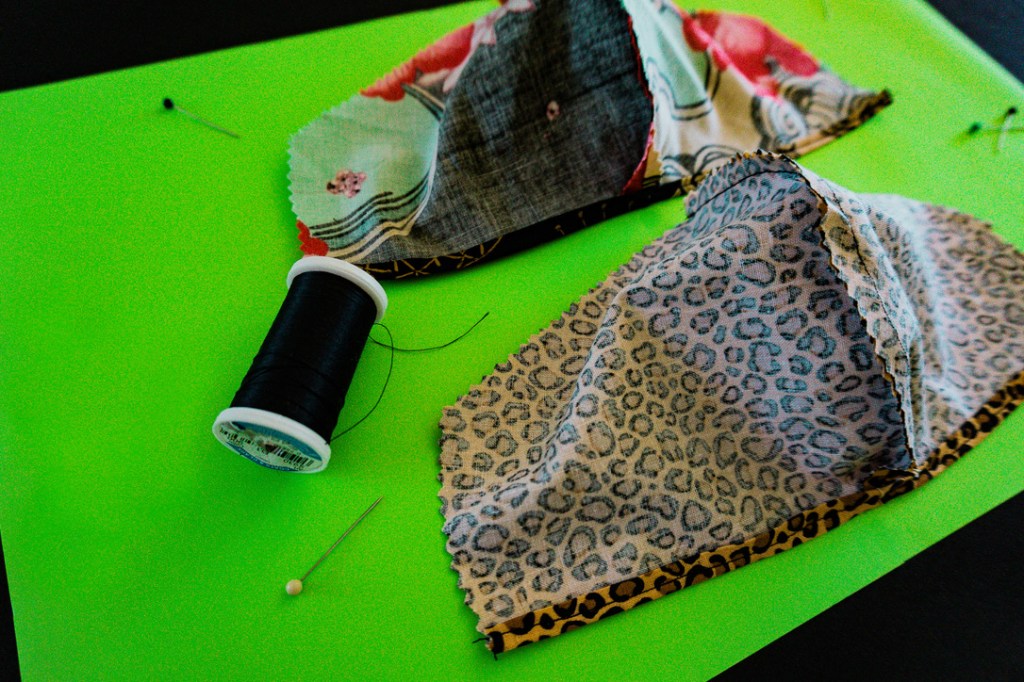
With the right sides together and the wrong sides facing outward, run a seam along what will become the vertical center of the mask. The angular mask only needs to be sewn at the nose and chin, if the pattern was cut from a single, folded piece.

When symmetry really matters, pin well and stop the machine every few stitches to check for alignment.

Once both sides have been joined down the center, turn over the bottom edge, twice, use a very hot steam iron to press a narrow hem, and stitch what will become the hidden opening for the filter pocket.
Before pinning the two right sides together, cut 12-inch ear elastics, which will provide plenty of length for adjustment and customization later.

When pinning for symmetry, start in the middle, align the center seams on top and bottom, and move outward, using pins to mark where to stop sewing for the two-inch filter opening at the chin and for the elastic channels at the bottom of the ear loops.
Double check that the channels allow the elastics to slide in and out, but are snug enough to prevent a plastic barrel bead from escaping. (Regarding the type of pony/barrel bead used, think back to that time Joann from accounting returned from her island cruise, sporting beaded hair braids, channeling her inner Bo Derek. Or, recall Josh, the Club Kid intern, who kept bashfully tucking his weekend rave bracelet back into the un-ironed dress shirt he borrowed from his dad.)
Firmly pin the ear elastics, at a slight angle, where the the top seam will secure the upper portion of the ear loop, ensuring that the elastics will slant smoothy upward and outward, when turned right-side out. However, at this point, the elastic loops are still “inside” the inside out mask. Fold the tailpiece of the elastic twice, and hand-stitch a flat, finished end to retain the adjustment bead. With the pinned side down (because I learned that cleaning colorful streaks of melted, plastic pin tops off the iron isn’t as fun as it sounds), press the two, pinned fabrics for smooth, pucker-free seams.

Before sewing the front and back together, double check that everything is even on both sides, especially since this will not be a continuous seam. There will be a two-inch opening for the filter pocket, and two channel openings barely larger than the width of the elastics, yet smaller than the width of the plastic beads. Back stitch to reinforce the seam ends on both sides of the three openings.
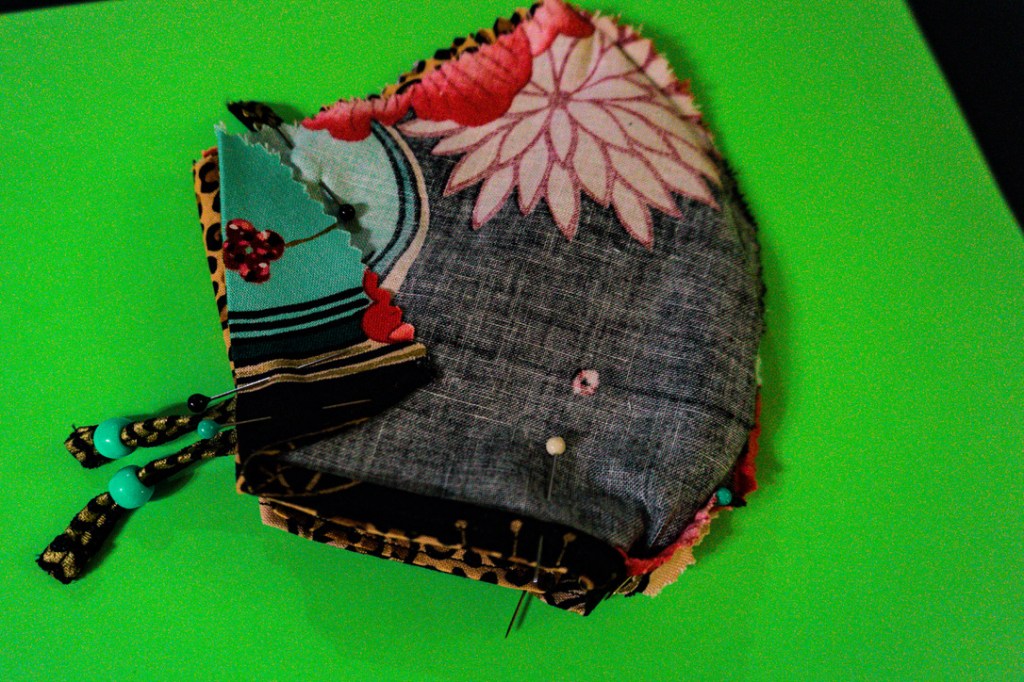
At this point, shape a length of floral wire, which follows the top curve of the mask. The wire should extend just beyond the outer edges of the mask. By wiring the entire width of the mask, instead of the usual inch or two just over the nose, the contour, comfort, and custom fit of the mask is greatly improved. Use pliers to bend the extra wire into a tight, flat curlicue, making certain to leave no protruding ends–unless becoming a human voodoo doll is your thing.
Tack the wire in place, with several, durable, hand-stitched knots, making sure the knots are very close to the top seam, and just barely above it. This ensures that the knots won’t be visible when the mask is turned right-side out, and correctly positions the wire for top-stitching later on. Remove any extra fabric from the inside of the mask’s filter pocket to achieve a smooth, sleek appearance.

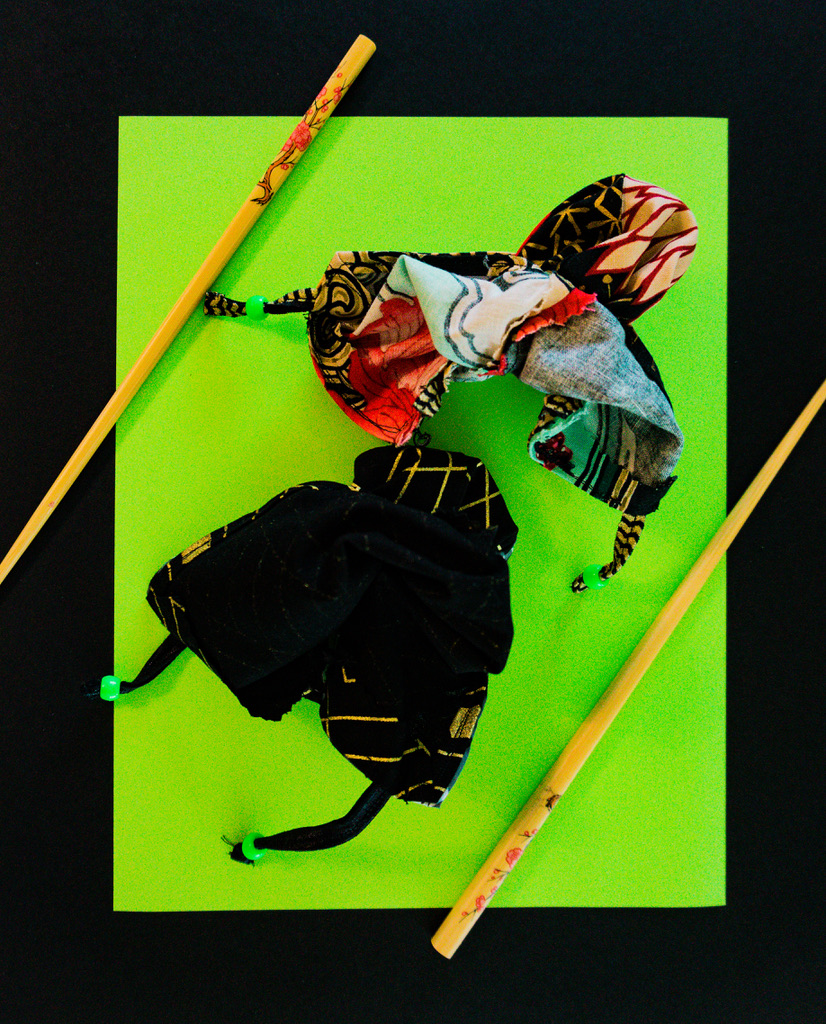
A chopstick, or a capped pen, helps when turning the wired mask right-side out, especially when pushing out the corners and seams.
With ear loops facing outward, and the printed sides showing, tuck in any lumps or bumps along the seam to create the most uniform outer edge, and generously pin everything into place. The nose wire should be bent convexly, so that it pushes against the top seam, and should be pinned as close to the top edge as possible. This will make top-stitching much easier.

With the pinned side down (because no one likes melted pin tops), prepare for a precise top-stitch by steam pressing the edges of the mask.
Steam pressing retains the uniform edge and helps display the outline of the nose wire, so that it can be trapped between the outer edge and the narrow top-stitching.

Just like sewing the inner seams, the top-stitching will not be continuous. Also, remember to back stitch to reinforce the filter pocket opening, and back stitch the ends near the elastic channels, at a perpendicular angle. Just be sure not to catch the bottom elastics, so they can slide freely for subsequent adjustment and customization.
Remove any stray threads, and iron the mask folded flat, with all of the sides aligned. The finished mask will become the custom pattern for the perfectly-fitted, virus-blocking filter.

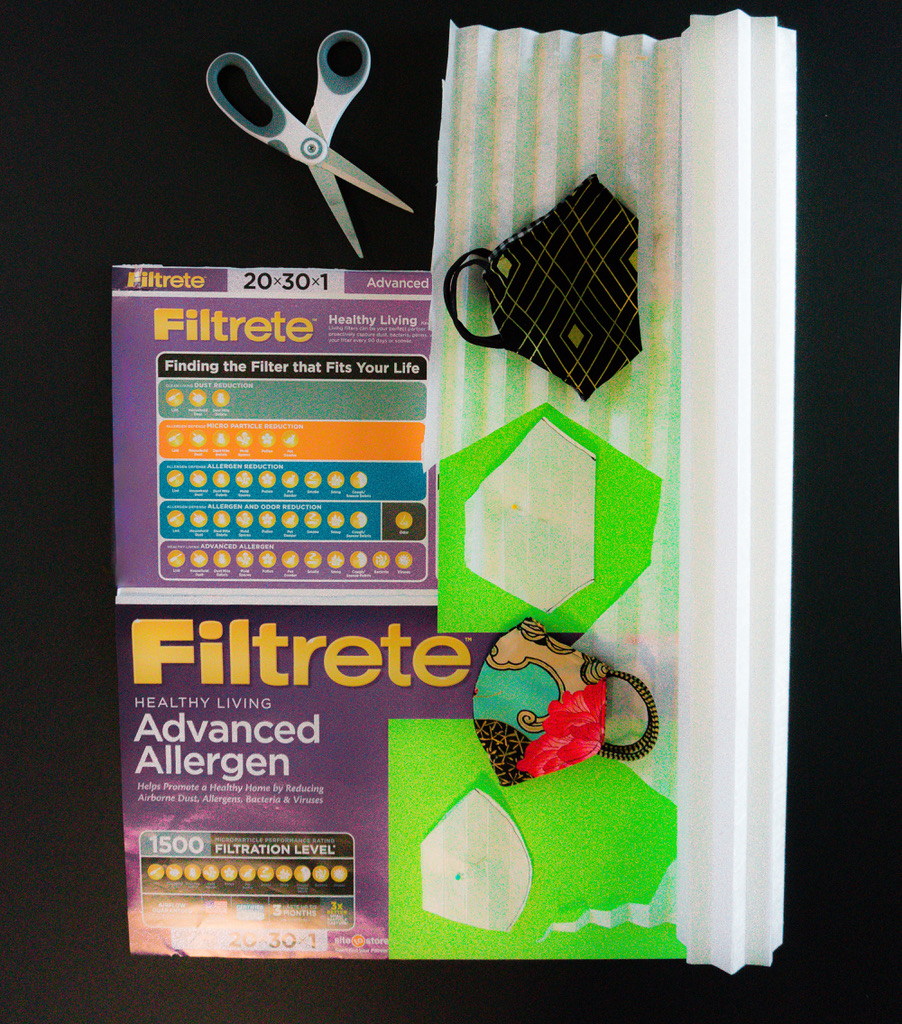
Readily available filter material can be purchased at any of the big box and home improvement stores. Look for an air conditioning filter with a high filtration number, and search for virus filtering capabilities in the description. It is fairly simple to remove the pleated filter material from it’s cardboard frame and wire screen. What remains, when the pleats are flattened, is fortunately much larger than the given dimensions. Filters are typically rated for 90 days of use, and numerous mask filters can be cut from a single AC filtration unit. Furthermore, buying a replacement unit with larger dimensions makes these virus-blocking filters an even better value.
Double the filter material, folding along one of the pleats, and pin the two sides together. Trace the profile of each mask, cut inside the traced line, and stitch the center seam. The folded filter should be slightly smaller than the profile of the folded mask.
Position the top, center of the stitched filter over a chopstick, or the eraser side of a pencil, and slide the filter into place, making sure to smooth the filter so that the edges meet snugly against all sides of the filter pocket.
To custom-fit the ear elastics, pull the ear elastics tight, from inside the filter pocket, decreasing the size of the ear loops, and push the plastic bead firmly against the elastic channel in the bottom corner.
Have the intended wearer hold the middle seam centered over the bridge of their nose. The wearer should slowly pull each ear elastic over both ears, one at a time, while keeping the mask securely centered.
Once the ear loops are adjusted to the approximate size, the wearer can make further adjustments by pulling out more slack to loosen, or reach inside the filter pocket to pull and tighten the elastics. It helps to pin the elastics, directly at the bottom corners, just before removing the mask to preserve the intended adjustments.
Carefully remove the mask, access the free end of the elastic via the filter pocket, and tie a knot directly below the bead.
Since a smooth and sleek appearance is the goal, the extra ear elastic can be trimmed once the wearer has determined the desired adjustment for both comfort and proper fit.

During the fitting, determine how much of a top flap to fold over. The wearer will decided how snug the mask should fit against his or her chin, and fold over more fabric to create a shorter mask, or less to give more room. Also, note that the folded flap lowers the nose wire, allowing glasses to sit evenly and comfortably atop the mask, therefore reducing lens fog.
Iron the folded flap in place to create a smooth fold, and while you’re at it, give your finished mask one more pressing. Just be careful to use a lower, synthetic fabric setting if the filter is installed. Otherwise, the filter material could melt.

The masks are hand-washable (not machine washable due to the wire), and should be washed frequently. Never reverse an unwashed mask, since side facing outward is where the contamination is. Just remove the filter, hand-wash the fabric thoroughly, gently squeeze out excess water, and air dry. Steam press the fabric, and replace the filter.
For convenience, multiple filters can be made at one time, or as needed, since the filter material is plentiful. Plastic zipper bags are a great way to preserve and store unused filters and filter material (which can be folded), preventing contamination.
When making masks for friends or family, I slip the mask, with its installed filter, plus a few replacement filters in a zipper bag, and include the following, printable note of explanation:
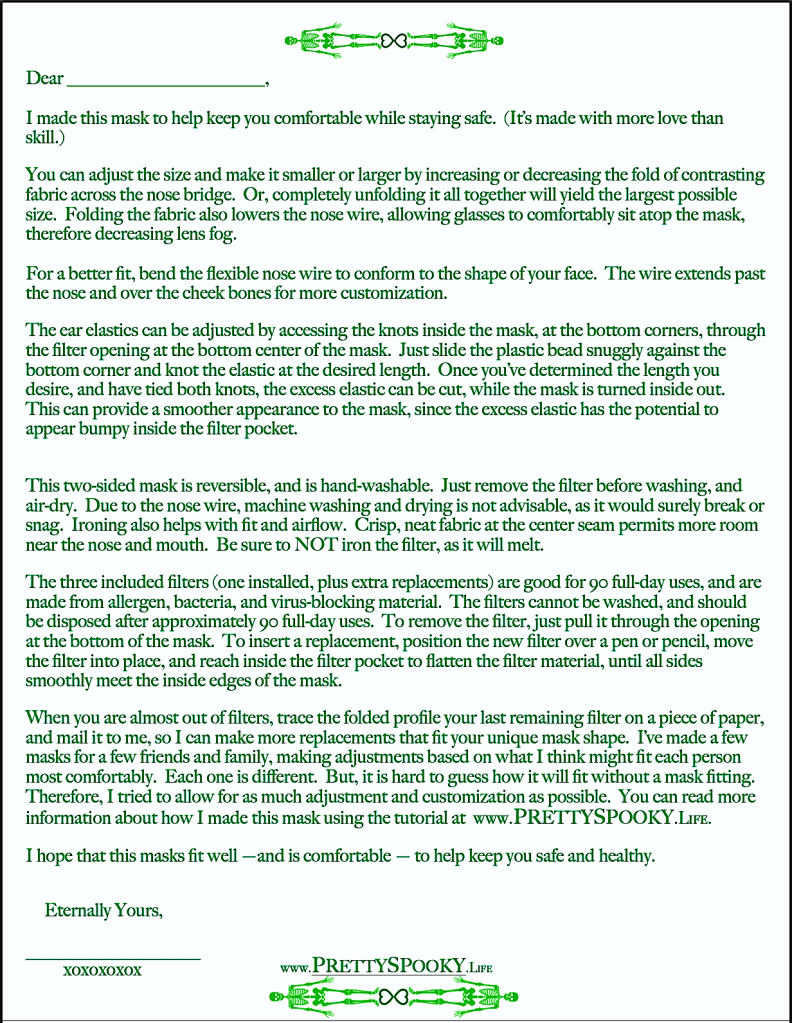
Now that you’re ready to create your own Pretty Spooky mask, print one of the three designs that fits you best (or make extras for your fellow Pretty Spooky fiends), and gather the materials:
- Printed Pretty Spooky Mask Design Patterns
- Craft foam sheet (optional, for a more durable pattern)
- Pen (for tracing)
- Pinking shears
- Regular scissors
- Measuring tape
- Multi-setting steam iron
- Sewing/quilting pins
- Breathable fabrics (suggested: woven cottons of similar weight and weave)
- Elastic (24″ per mask)
- Coordinating thread
- Needle for hand-stitching
- Floral wire
- Pony/barrel beads
- Chopstick (or other pointed utensil for pushing out corners and installing filter)
- Virus-blocking AC filter material
- Plastic zipper bags (for storing extra filters)

The curved design is the one that I use for myself. Although, I haven’t made any masks for any Pretty Spooky Kids, yet, I’d conjecture this would be the best of the three designs for little boils and ghouls, or any creature with a pixie-like profile.
For the less impish, grown-up goblins with wizardly contours, or the silhouette of a siren, settle upon the design that merges the alchemy of angles and enchantment of curves.


Regal lines and defined forms are magnificently spellbinding, and demand ample adaptations, worthy of the sovereign.

Select this striking design, characterized by crisp corners, for lords and ladies of distinction.


Not only are masks prominently perched facial adornments, which beg for variety in style and color options. Masks are also a mode of responsible activism, and a Halloween-saving form of self expression.
With so many holidays and special events already lost to this pandemic, it’s heart-breaking to fathom how Halloween might suffer the same fate as Spring Break, St. Pat’s, Easter, Graduations, and Independence Day. Only, what’s worse, is that Halloween is the holiday of community, where families go out together, and connect with neighbors, sharing the light-hearted revelry of the night. With so much time spent apart, communities need Halloween to reunite and celebrate as kindred spirits of hope and solidarity.
So, let’s save Halloween! Make a few, for yourself and your Spooky Squad. Then, proudly post your creations on “The Gram”, making sure to tag @PrettySpooky (because I’d love to see them). Please join me in the cause, and use the hashtag #SaveHalloweenfromCovid-19 to help promote a healthy Halloween for all!
P.S. … Stay tuned for a BIG announcement (to be released very soon on “The Gram”, Pinterest, and www.PrettySpooky.Life) regarding how we can all help preserve Trick-or Treating amid this pandemic.


One thought on “The Mask Tutorial That Saved Halloween from COVID-19”
Comments are closed.