The Easiest Tiki Cocktail & a Lighted Tiki Lamp Swizzle DIY

If you’re like me, you love spooky things with interesting history cloaked in danger— or maybe it’s just me.
But, I am certain this episode’s cocktail is the EASIEST Tiki cocktail, you’ll ever make— and it has quite an interesting history.
And to STIR up even more SPIRITS, I’ll show you how I made my lighted Tiki Lamp Swizzle. Plus, I’ll share unlimited, no-strings-attached access to the printable template to impress your guests with your very own lighted swizzle set.
Hello, and welcome to The Sunken Compass, my home bar. I’m Angela, your Haunted Hostess and creator of Pretty Spooky — which is a lifestyle brand and the grown-up’s guide for how to create Halloween fun year-round.
Since Tiki feels like the grown-up version of Halloween, I find ways to reduce its sugary impacts and to keep the fun going year-round for my home bar guests and myself.
I’ve created an entire menu of lower-carb drink options, based on original Tiki recipes from the past, for several reasons. And while there isn’t too much that is “healthy” about any cocktail, for me, every little bit helps. So, wherever I can, I cut the carbs, but keep all the flavor! I call this my “Low Carb on the High Seas” approach to Tiki cocktails.
So, in this episode of Pretty Spooky Presents… , let’s shine a light into the Dark ’n Stormy’s past with this Tiki Lamp Swizzle.
Before we embark on our journey from 1806 England, I’ll mention you can watch the making of he Pretty Spooky Tiki Lamp Swizzle on my Youtube Channel, PrettySpooky Presents, and linked on the home page, here, at PrettySpooky.Life. The printable template is free, no emails required, no strings attached. These Swizzles are just too fun to keep to myself.
To make the Lighted Tiki Lamp Swizzles, you will need:
- The Pretty Spooky Tiki Lamp Swizzle Template
- Printable Transparencies
- a color Printer
- White Printer Paper
- Scissors
- Packing Tape
- a Glue Gun with Glue
- Mini Ballon LEDs (I prefer multi-colored, but non-flashing)
- Waxed Cotton Cord
- Pliers
- Jewelry Jump Ring
- Metal Shish-kabob Skewers
- I used a Dremel ensure the cut skewer was smooth to the touch
There are no strings attached, no emails collected, and no nooses around any necks.
Watch how to make Tiki Lamp Swizzles here: “The Easiest Tiki Cocktail & LIT Tiki Lamp Swizzle”
It’s as simple as opening the template below, expanding the image to fit a “Narrow Margins” document on your computer, loading up your printable transparencies–and hitting “print”.

Next, with a piece of white printer paper touching the printed side of the transparency, start with a “rough cut-out”, which will allow you to do more detailed cutting later. Hold the transparency firmly to the paper, so they are cut identically.
Trim the edges, first. Take special care around the P.S. logo circles, as these will help fasten your lamps closed. Do not cut the “triangle” notches, yet.
Stretch out a strip of packing tape, longer than your Lamp Template. it helps to curl the ends down, so the strip of tape is held still and partially stuck to your work surface.
With the cut printer paper perfectly aligned with the cut transparency, lay the cut template and paper onto the tape, with paper side adhering to the tape. Your goal is to create a barrier that is semi-impervious to liquids/cocktails, sandwiching the paper in the center.
Center the two cut layers on the strip of packing tape. Press firmly, working out any bubbles.
Fold the equally sized edges of the tape over the transparency, sealing the paper inside. Do not fold the tape over the short sides with the P.S. logos.
Only now, can you cut the triangle-shaped notches, leaving five, connected, six-sided polygons.
Fold two straight lines, following the center band of the polygons. this will allow the edges of your polygon to align more closely during construction and create the shape of your Tiki Lamp.
Heat up the glue gun with clear glue sticks. The amount of glue used in minuscule. But the time spent holding the sides together until the glue sets– is not.
Once your lamp has taken shape, join the last sides, using the overlapping P.S. logos to reinforce the closure, with extra glue.
Once the glue is set, melt any excess, or bumpy glue joints with the side of the clean glue gun nozzle. Do not add more glue. You are simply smoothing the existing, cured glue, with heat — for aesthetics.
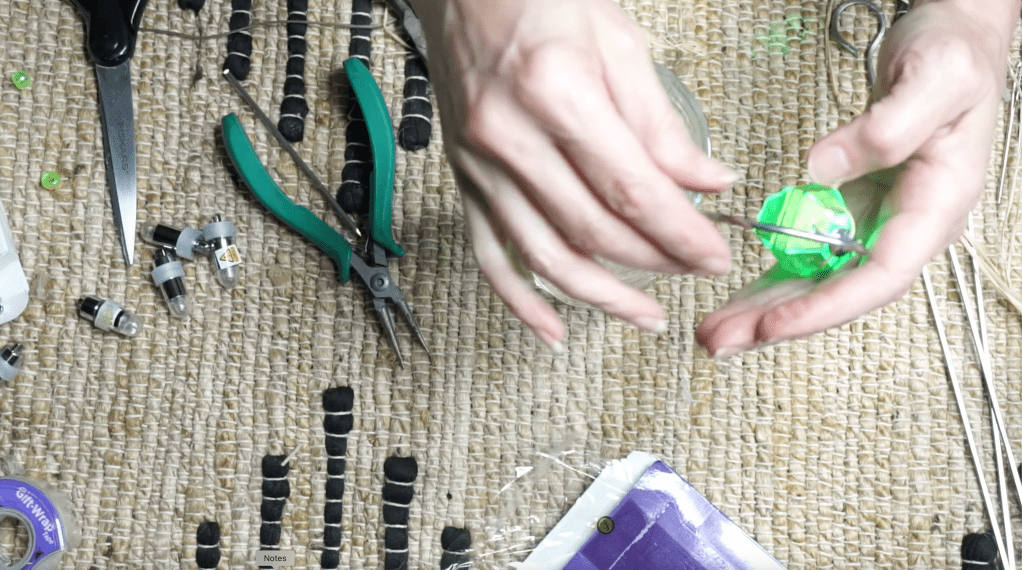
Once your lamp is cured, and strong, use a needle or awl, to poke four holes for the waxed canvas cord to form an “X” across the top of the lantern, with your balloon LED threaded in the center of the “X”. Leave enough slack so you are able to hold the top and bottom of the LED to twist it on and off.
Place a jump ring, from the jewelry supply section of your craft store, in the center of the balloon LED. This will allow you to remove the lamp when it’s time to wash the swizzle.
Measure the height of the glassware the swizzle will adorn. Make sure the approximately 75* bend is tall enough to clear the top of the glasses and mugs . After the bend in the skewer is created, measure the with of the glassware opening. You want the “arm” of the swizzle that holds the lamp to be slightly wider than the opening of the glass, to prevent it from falling in your drink. Make sure to account for the hook on the end that will hold the jump ring.
Angle the hook downward, allowing gravity to display the lamp attractively and securely. Do not close the hook portion too tight, or else the jump ring will not easily unhook for cleaning of the swizzle.
Twist your LED on, and light up your favorite drink for the next few hours. I suggest my Low Carb on the High Seas version of the traditional Dark ‘N Stormy– But Lit!
While The Dark ’N Stormy might be the most effortless Tiki Cocktail you’ll ever make, it’s origin wasn’t such smooth sailing.
Matter of fact, Goslings, the company that trademarked The Dark ’n Stormy, set course to America, but never made it. For 91 days, their ship, the Mercury, was literally DEAD in the water.
Out of time and with nowhere else to turn, they began their treacherous detour, past the notorious ship-shredding coral reefs of the Shipwreck capital of the world—Bermuda, where they made the most of their erroneous landing and set up shop, selling their rum in barrels, at first. Then, still characteristically looking for the bright spot in a dim situation, during WWI, the Gosling family repurposed the discarded British Naval Officer’s champagne bottles to make their rum more accessible to the masses, and sealed the bottles with black wax— hence the name Black Seal.
And that’s not where Gosling’s ties to the British Navy ends. Since Ginger Beer was being produced on the island of Bermuda, as a tonic for sea-sick sailors, it was discovered that Black Seal rum and Ginger Beer made the perfect potion when paired with a squeeze of lime. It seems when life ave the Gosling family limes and ginger— they made a Dark ‘n Stormy. And, to make this drink with any other rum would violate Gosling’s trademark, so you better give that mixture a new moniker. Because the dark rum, poured atop ginger beer resembles a threatening storm brewing on the horizon, it became The Dark ’n Stormy. However, this is ONE storm that sailors will happily welcome.
Gosling’s recipe for one-and-only, trademarked Dark ’n Stormy calls for :
- A tall glass filled with ice.
- Add 6 oz of Goslings Stormy Ginger Beer
- Float 2 oz of Goslings Black Seal Rum on top
- Stir until your drink looks like a storm cloud.
- And a lime wedge garnish is considered optional.
And here at the Sunken Compass, while we are still sailing in the same direction, I adjusted course just a little.
I make my own ginger syrup with fresh ginger in my masticating juicer, as 1 part ginger juice, 1 part water, and 1 part Brown “Sugar” Swerve, and 2 oz white rum to aid in preservation.

You can also make your own ginger syrup without the masticating juicer, and throw your fresh, peeled and chopped ginger in a blender with the water, sweetener, and rum, and blend on HIGH until no visible ginger fibers remain. Strain if necessary.
I prefer either of these methods over the stovetop method for adding a brighter, spicier ginger kick to any cocktail. Most low-carb sweeteners will crystalize when refrigerated— but that’s par for the course.
Start with:
- 1 oz fresh lime juice
- 1 oz Ginger Syrup
- Add 4 oz of Goslings Diet Ginger Beer
- Fill with enough ice to allow room for…
- 2 oz Goslings Black Seal
- Add more ice
- Garnish with a lime wheel, which is just for looks, since there’s already lime juice in this version and no need for a wedge to squeeze
- Add your Pretty Spooky Lighted Tiki Lamp Swizzle to make … The Dark’n Stormy — but Lit!

This is one of the easiest Tiki cocktails to whip-up on a moments notice. And while it’s not currently on my Sunken Compass Guest Menu, it’s a great option to offer those who aren’t accustom complex Tiki Cocktails, yet.
I’ve even used the Ginger-syrup, lime juice, with ginger beer and a few dashes of Angostura to make a Suffering Bastard Mocktail, garnished with mint and my homemade Luxardo Cherries— which has been a real crowd pleaser here at The Sunken Compass.
If you try the “Dark ’N Stormy— but Lit” recipe and made your own set of Swizzles, let me know what you thought and how it went in the comments.
Don’t forget, the printable template and instructions for the Pretty Spooky Tiki Lamp Swizzle above. It’s free, no emails required, no strings attached. The visual instructions are on my YouTube video: “The Easiest Tiki Cocktail & LIT Tiki Lamp Swizzle”
Be sure to share pictures of your LIT creations under the IG hashtag #PSLitSwizzles!
I loved being your Haunted Hostess. You were a wonderful guest! You’re welcome back any time! … Farewell until next time… Cheers!

